Coding a Pomodoro Timer - Part 5
- Coding
- HTML
- CSS
- Javascript
July 25, 2023
In the last post I made the main timer function work, with the option to pause or reset the timer. It is now time to add the functionality of the break time.
startBreak()
The code follows a similar pattern to what was implemented in
the "startTimer" function. However, in this context, I'll modify
the timerState color and text to let the user know
that they are currently in break mode. Additionally, I'll create
a new function called onBreaksUp instead of
"onTimesUp" to handle the end of breaks. I'll finally introduce
a new variable named isFocusSession and set it to
"false". At the beginning of my code, I'll create the variable
like this: let isFocusSession = true. This variable
will be used to differentiate between focus sessions and break
sessions.

I want the timer to have three cycles, with each cycle followed
by a break. To achieve this, I'll create a new variable to track
the cycles. At the beginning of my code, I'll add the following
line: let currentCycle = 0. Next, I'll make a
modification to the "startTimer" function. I'll include this
line of code inside the function:
currentCycle += 1. This way, the "currentCycle"
variable will be incremented by one every time the "startTimer"
function is executed, effectively keeping track of the ongoing
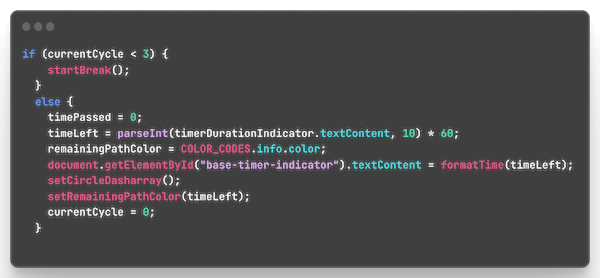
cycle. Now, it's necessary to update the "onTimesUp" function as
well to account for the cycles. I'll add an if-statement to
check the current cycle and decide what to do next. With this
if-statement, the "onTimesUp" function will start a break if
fewer than three cycles are completed, and if all three cycles
are finished, it will reset the "currentCycle" to 0 and end the
session.
onBreaksUp()
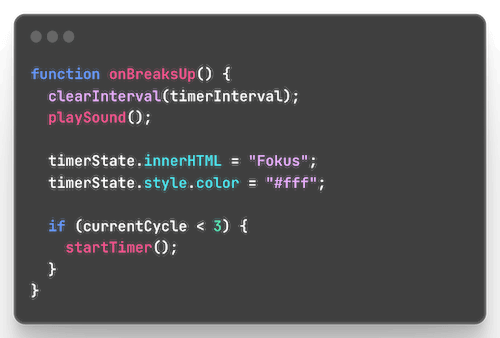
With this implementation, the "onBreaksUp" function will handle
clearing the timer, playing a sound, and updating the timer
state. Additionally, it will check if the current cycle is less
than 3, and if so, it will initiate a new timer session to
continue the focus sessions in the three-cycle structure.
playSound()
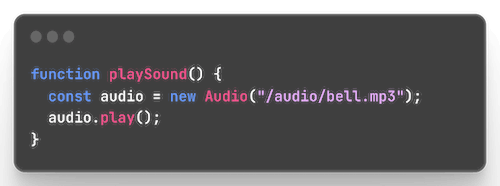
With this function, I'll create a new HTML "Audio" object and
assign a variable "audio" to it. The "Audio" object is a
built-in Javascript object that represents an audio element in
the DOM (Document Object Model). I'll assign the file to it, so
that the "Audio" object will load and play it. Then, with the
last line audio.play() I'll call the "play()"
method of the "Audio" object. The "play()"" method is used to
start playing the audio file associated with the "Audio" object.
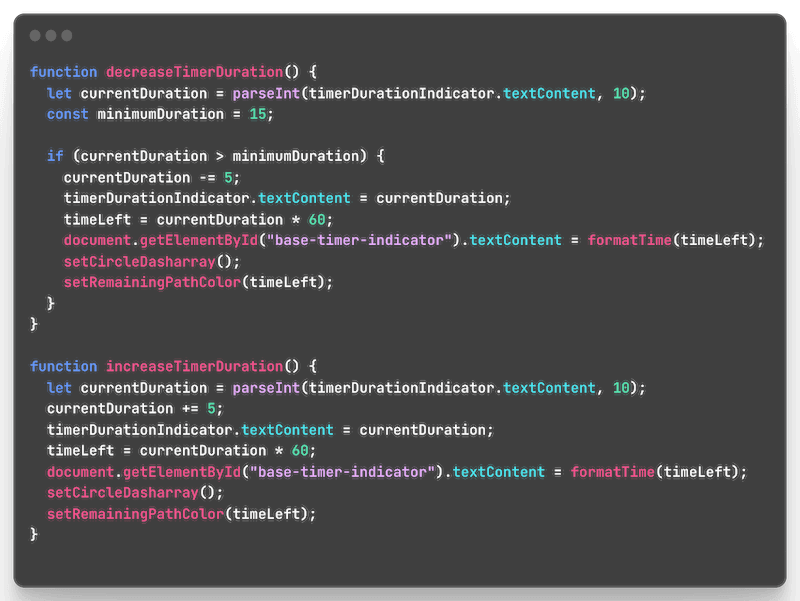
decreaseTimerDuration() & increaseTimerDuration()
It's time to work on the last remaining functions, the settings,
which will allow users to adjust the timer and break durations.
Let's begin with the decrease function. First, I'll retrieve the
current timer duration from the "timerDurationIndicator" element
and convert it to an integer, as I have done in previous parts
of the code. Then, I'll create a variable called
minimumDuration to set the minimum timer duration
(I'll set it to 15 minutes as I don't want the timer to go below
that).
Next, I'll implement an if-statement to check whether the
"currentDuration" is greater than the "minimumDuration." If it
is, I can proceed to decrease the timer duration by 5 minutes.
Once the duration is updated, I'll also make sure to update all
other relevant elements.
Moving on to the "increaseTimerDuration" function, I'll follow a
similar approach. Here, I don't need a minimum duration, as I
want to allow users to increase the timer without restrictions.
So, I'll simply add 5 minutes to the current timer duration and
update the necessary elements accordingly.
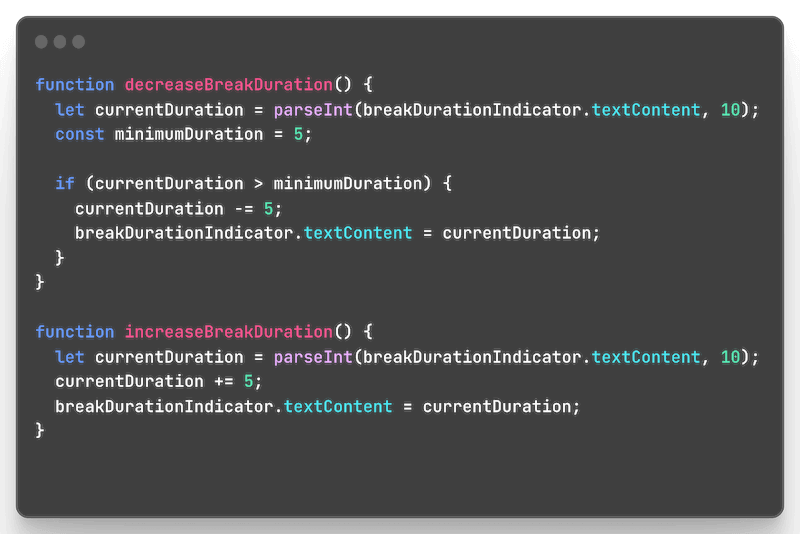
decreaseBreakDuration() & increaseBreakDuration()
The last two functions are pretty identical with the ones
before, only shorter, since I don't have to update any elements
besides the "breakDurationIndicator".
Refactoring
Refactoring in coding refers to the process of restructuring and
improving existing code without changing its external behavior.
It involves making the code cleaner, more organized, and easier
to maintain. That would be my next step. Additionally, I'll
thoroughly test the application to ensure its reliability and
handle any potential edge cases.
Continuous improvement is at the core of software development, and I'm excited to explore new features and optimizations. For now, that's it, thank you for joining me on this coding journey.
